Material Colors
Every object has its own color, which can be numerically represented by three components: red, green, and blue, commonly abbreviated as RGB. For example, to define "Alice Blue," we can do the following:
// Define color using RGBA values
const color = clr3(0.941, 0.973, 1.000, 1.0);
import { NamedColor } from 'ore.color';

// Use a predefined color interface from the color library
const color = NamedColor.aliceblue;
In real life, the color we perceive for an object is not its inherent color but the color it reflects. In other words, the colors that are not absorbed by the object are the ones we can see. The material color defined above represents what we perceive under a white light source. However, if the light source has a different color, the final color vector would be:
const lightColor = clr3(0.0, 1.0, 1.0);
const resultColor = color * lightColor;
In the engine, there are several ways to directly define the color attributes of geometry:
- Define through the material's uniform parameters.
- Define through vertex buffers (VBO).
To simplify these processes, we have encapsulated these methods into simple material interfaces in the material library. You can refer to: Using the Material Library
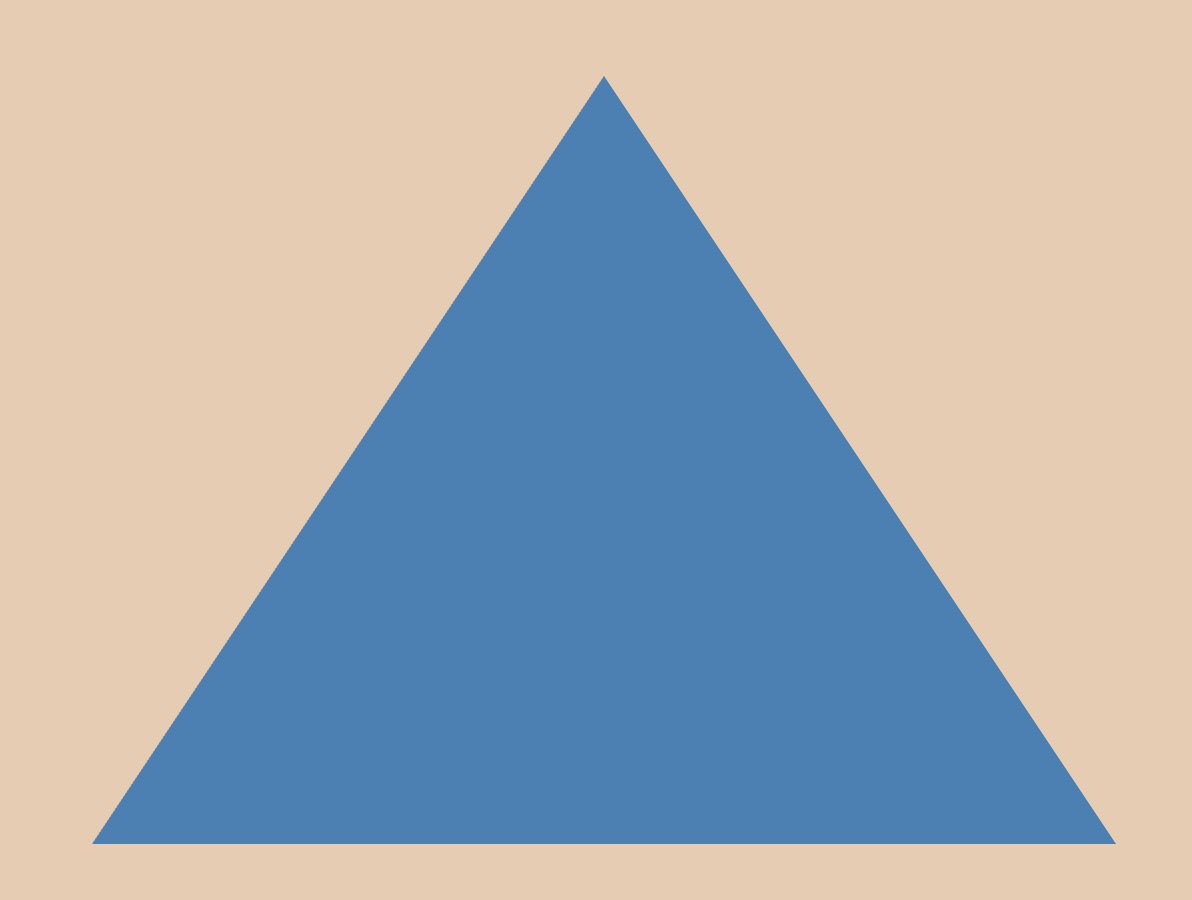
Color as a Uniform Parameter
You can define the color property of a material directly when creating it. This color property is included in the parameters section of the material. In the example below, the material's color property is named color, and a corresponding uniform variable color is declared in the fragment shader to participate in calculations and produce the final color output, fragColor.
const vs = `#version 300 es
in vec2 positions;

void main() {
    gl_Position = vec4(positions, 0.0, 1.0);
}`;

const fs = `#version 300 es
precision mediump float;

uniform vec3 color;
out vec4 fragColor;

void main() {
    fragColor = vec4(color, 1.0);
}`;

const material: JMaterial = {
    program: {
        // Specify the vertex and fragment shaders for this material
        vertex: vert(vs),
        fragment: frag(fs)
    },
    parameters: {
        // Specify the material's color
        color: clr3(0.4, 0.6, 0.2)
    },
    states: {
        // Enable depth testing
        depth: Depth({ enabled: true })
    }
};
When running the program, you will see the following result:
Color as a VBO
The uniform color described above is a tool for data exchange between the program and the shader. However, if we need to assign different colors to each vertex to create a gradient effect, we need to use the following method.
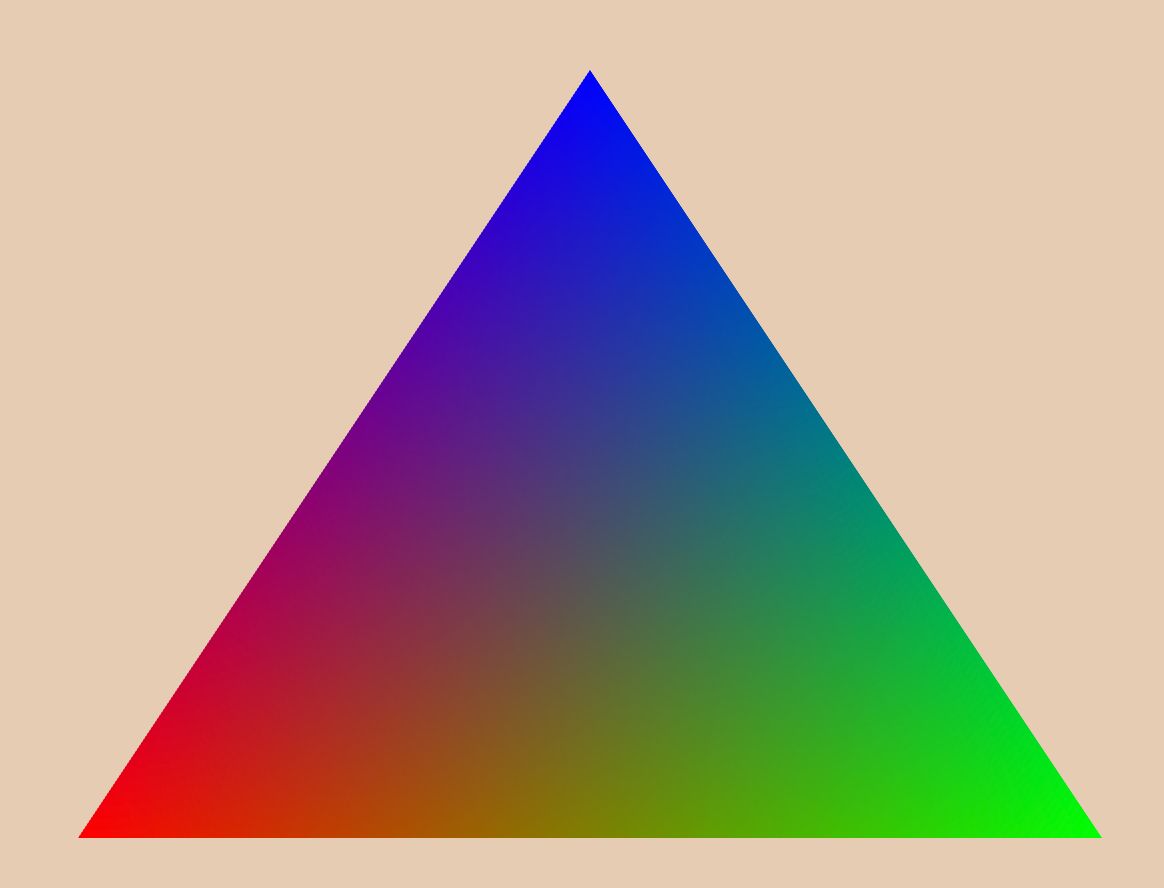
From previous geometry tutorials, we’ve learned how to use VBOs to define the positions of geometry vertices. Similarly, we can use VBOs to define vertex colors, as shown in the example below:
const geometry: JGeometry = {
    vertices: {
        positions: Vertices({-0.5, -0.5, 0.5, -0.5, 0.0, 0.5}),
        // Three vertices with red, green, and blue colors respectively
        color: Vertices({1.0, 0.0, 0.0, 0.0, 1.0, 0.0, 0.0, 0.0, 1.0}),
    },
    indices: Triangles([0, 1, 2]),
    boundingBox: bbox(-0.5, 0.5, -0.5, 0.5, 0.0, 0.0)
};
Next, we send the vertex color data to the vertex shader by defining it as a vertex attribute input.
const vs = `#version 300 es
#version 330 core

in vec2 positions;
// Use the color VBO as an input variable
in vec3 colors;
// Define an output variable to pass to the fragment shader
out vec3 v_Color;

void main() {
    gl_Position = vec4(positions, 0.0, 1.0);
    v_Color = colors;
}`;

const fs = `#version 300 es
precision mediump float;

// Use the v_Color passed from the vertex shader instead of a uniform
in vec3 v_Color;
out vec4 fragColor;

void main() {
    fragColor = vec4(v_Color, 1.0);
}`;
When running the program, you will see the following result: